Published at nancymanos.com/homeschooling. Reprinted with permission.
—
During our homeschooling years, one of the many goals I had for our daughters was for them to expand their vocabulary and develop good communication skills. I came up with a fun way to help them learn new vocabulary words that we called Words of the Week.
We recognized the benefit of our Words of the Week activity one afternoon when the girls were about nine and eleven during a discussion over lunch out at a restaurant. Our oldest daughter, Olivia, wanted to get her hair cut in a particular style. I wasn’t in favor of this, and a conflict arose between us. My husband—ever the problem solver—began asking each of us questions to help us understand the other’s position and hopefully come to an agreement. When neither of us would bend, our younger daughter, who had been pretty quiet during most of the discussion, chimed in and stated that it seemed we had reached an impasse.
As you probably guessed, “impasse” was a vocabulary word Alex learned through our Words of the Week activity. James and I were impressed with her appropriate use of this word at a very unexpected moment. We all had a good laugh together and enjoyed the rest of our lunch. I don’t recall what we decided about Olivia’s hair, but I’ll never forget Alex’s use of her vocabulary word at just the right time!
Getting Started
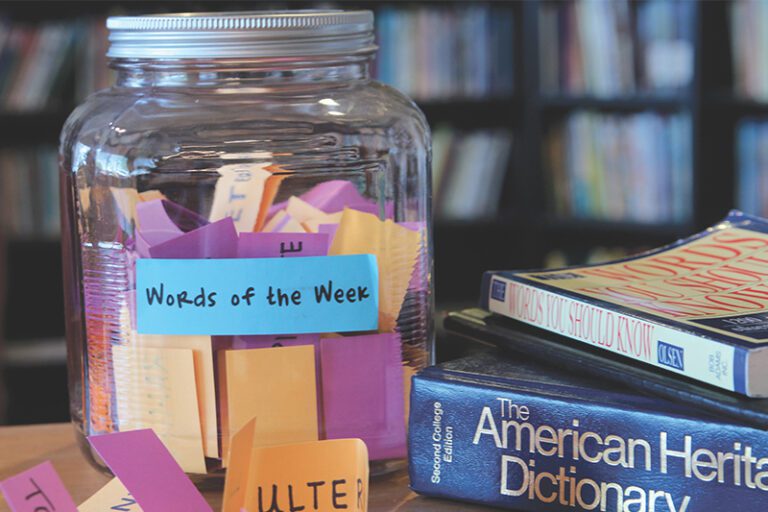
I used the book Words You Should Know by David Olsen to select about 100 words that I thought the girls should learn in a year. This book of “1,200 essential words every educated person should be able to use and define” helped make the task of choosing words a little easier than hunting through tens of thousands of words in a dictionary.
First, decide how many words per week you’d like your children to learn. Multiply that by the number of weeks in your school year, and choose enough words to meet your needs. We aimed to do Words of the Week two to three times per week. (See preparation instructions at the end of this article.)
Words of the Week Activity
Supplies Needed
- A composition notebook or spiral-bound notebook for each student
- A dictionary
- A notebook for Mom or Dad to track completed words (optional)
Each child selects a word from the jar—on their assigned color of card stock—and performs the following Words of the Week tasks:
- LOOK UP THE WORD in the dictionary.
- WRITE THE WORD in his/her notebook, along with the part of speech and a definition of the word from the dictionary.
- WRITE AN ORIGINAL SENTENCE correctly using the vocabulary word.
- GIVE THE WORD TO MOM OR DAD to record each child’s word, one word per line (optional).
Reinforcement Activities
ACTIVITY #1 – USE WORDS OF THE WEEK IN CONVERSATION
Throughout the week, each student tries to use the new vocabulary word in conversation as much as possible. Every time he or she uses words of the week appropriately, the parent or the child makes a tally mark next to the word in the parent notebook (optional). Mom or Dad can award prizes at the end of the week or month when the child successfully uses each word a certain number of times, if desired.
Using new words in conversation is an excellent way to reinforce what’s been learned and to adopt them as part of one’s vocabulary. In our family, it was quite amusing and gratifying to hear the creative ways the girls would use their words of the week in everyday conversation.
ACTIVITY #2 – CREATE A WORD FIND OR CROSSWORD PUZZLE
Provide graph paper with a larger grid (¼” works well), and encourage your children to create a word find or a crossword puzzle with at least ten of the words they have learned. Have the kids create an answer key, too.
Make copies, and your children can ask friends or family members to try to solve the puzzles. Our daughters liked having their dad do the puzzles they created when he was done with work for the day.
ACTIVITY #3 – CREATE A WORK OF ART
Have your kids create a poster by writing their words of the week in creative, colorful styles or using letter stamps.
Another idea is to create a ransom note style poster where they cut letters out of newspapers and magazines and glue the letters onto a poster board to spell out their vocabulary words.
ACTIVITY #4 – CREATIVE WRITING ASSIGNMENT
Ask your child to select a number of his or her vocabulary words and work them into a short story, letter, news report, or poem.
ACTIVITY #5 – REVIEW IN MOTION
Motion activities are great for younger children and those with kinesthetic learners.
Write your child’s vocabulary words on pieces of felt with a marker. Give the child a ping pong ball with hook-and-loop dots attached. Spread the felt words out on the floor. Read the definitions one at a time, and have your child throw the ball onto the word that goes with the definition you read.
Try out some variations of this review game. For example, the child could jump* onto the piece of felt with the word that matches the definition you read. He or she could throw a bean bag or a rolled-up ball of socks, and the words could be written on paper instead of felt.
(*Use caution when having your kids jump onto felt pieces, especially if you have hard-surface floors. This activity works more safely on carpeting where the felt won’t slip as easily.)
Preparation Instructions
If writing the words by hand:
STEP 1: CUT CARD STOCK INTO STRIPS
Cut paper into strips approximately 1″ x 4″ in size. Use a separate color paper for each student. Card stock works best. Construction paper and copy paper tend to break down more easily.
STEP 2: SELECT YOUR WORDS
Using a book like Words You Should Know by David Olsen or a dictionary, select about 100 words you want your children to learn. You may select identical words for all of your children or choose unique words for each student. If you have children of various ages, you may want to select age-appropriate words for each student.
STEP 3: WRITE EACH WORK ON A STRIP OF PAPER
Repeat on the other color(s) of card stock so that each student has their own set of words.
STEP 4: PUT THE WORD STRIPS INTO A JAR
Fold the strips in half, put into a large jar or container, and mix them up.
—
If typing the words on the computer:
STEP 1: SELECT YOUR WORDS
Same as step 1 above.
STEP 2: CREATE A NEW WORD DOCUMENT
Orientation: Landscape (horizontal)
Margins: 0.5″ on all sides
Columns: Two, change gutter (space between the columns) to 1″
Line Spacing: 3.0
Font: Bold, 20-24 pt font size, center alignment
STEP 3: TYPE THE WORDS YOU SELECTED INTO THE WORD DOC
You should get 18 words per page (9 words per column).
STEP 4: PRINT ONTO CARD STOCK
Print each student’s words on a separate color card stock so that each student has his or her own set of words.
STEP 5: CUT INTO STRIPS
Use a paper cutter or scissors to cut the word strips printed on the card stock.
STEP 6: PUT THE WORD STRIPS INTO A JAR
Fold the strips in half, put into a large jar or container, and mix them up.
—
OPTION: SINGLE SET OF WORD STRIPS
If you don’t want to make a separate set of words for each child, you could prepare one set and have each child write their name on the back when they complete a word, then place the word back in the jar for their siblings. Once all of your children have completed a word, it can be removed from the jar.
—
NANCY MANOS is a graduated homeschool mom of two. She taught her daughters from preschool through high school and found it to be a rich, rewarding, and sometimes challenging experience. Nancy is passionate about encouraging and equipping parents in the homeschool adventure. She and her husband, James, live in Gilbert, Arizona and are happy grandparents to two adorable grandboys. James and Nancy served together on the board of Arizona Families for Home Education (AFHE) for thirteen years, and Nancy was the Executive Director for three and a half years. Nancy enjoys blogging, cooking, quilting, and graphic design projects. nancymanos.com